You can only connect integrations if you are a Next Matter admin.
- No-code integrations: These integrations must be connected in the Next Matter portal in Automations library. When connected, you can select them directly as an Integration step, and in some cases, you might only need a few JSON details to configure the step.
-
Custom integrations:
- Advanced: You will find them in the Next Matter portal in Automations library. These integrations require you to give the 3rd party tool access to Next Matter, share login credentials when you connect them, and provide the endpoint and JSON request body when you use them in workflows. You will find database integration in this category, too. These integrations require you to enter a few more data items such as port, username, and password, and database hostname to connect.
- Pro: These integrations require authorizing your API calls with 3rd party-generated credentials. It might be the API key or basic authorization. You can provide the authorization details when you configure the custom integration step in Next Matter alongside the endpoint URL and JSON request body. You can also make calls to Next Matter API. This will also require you to authenticate your call - this time with the Next Matter API key you can generate in Company > Next Matter API keys.
Ensure you have permissions to generate authentication credentials in Next Matter and the external app. If not, your company admin should be able to provide those.
No-code integrations
How to connect an integration
How to connect an integration
How to connect an integration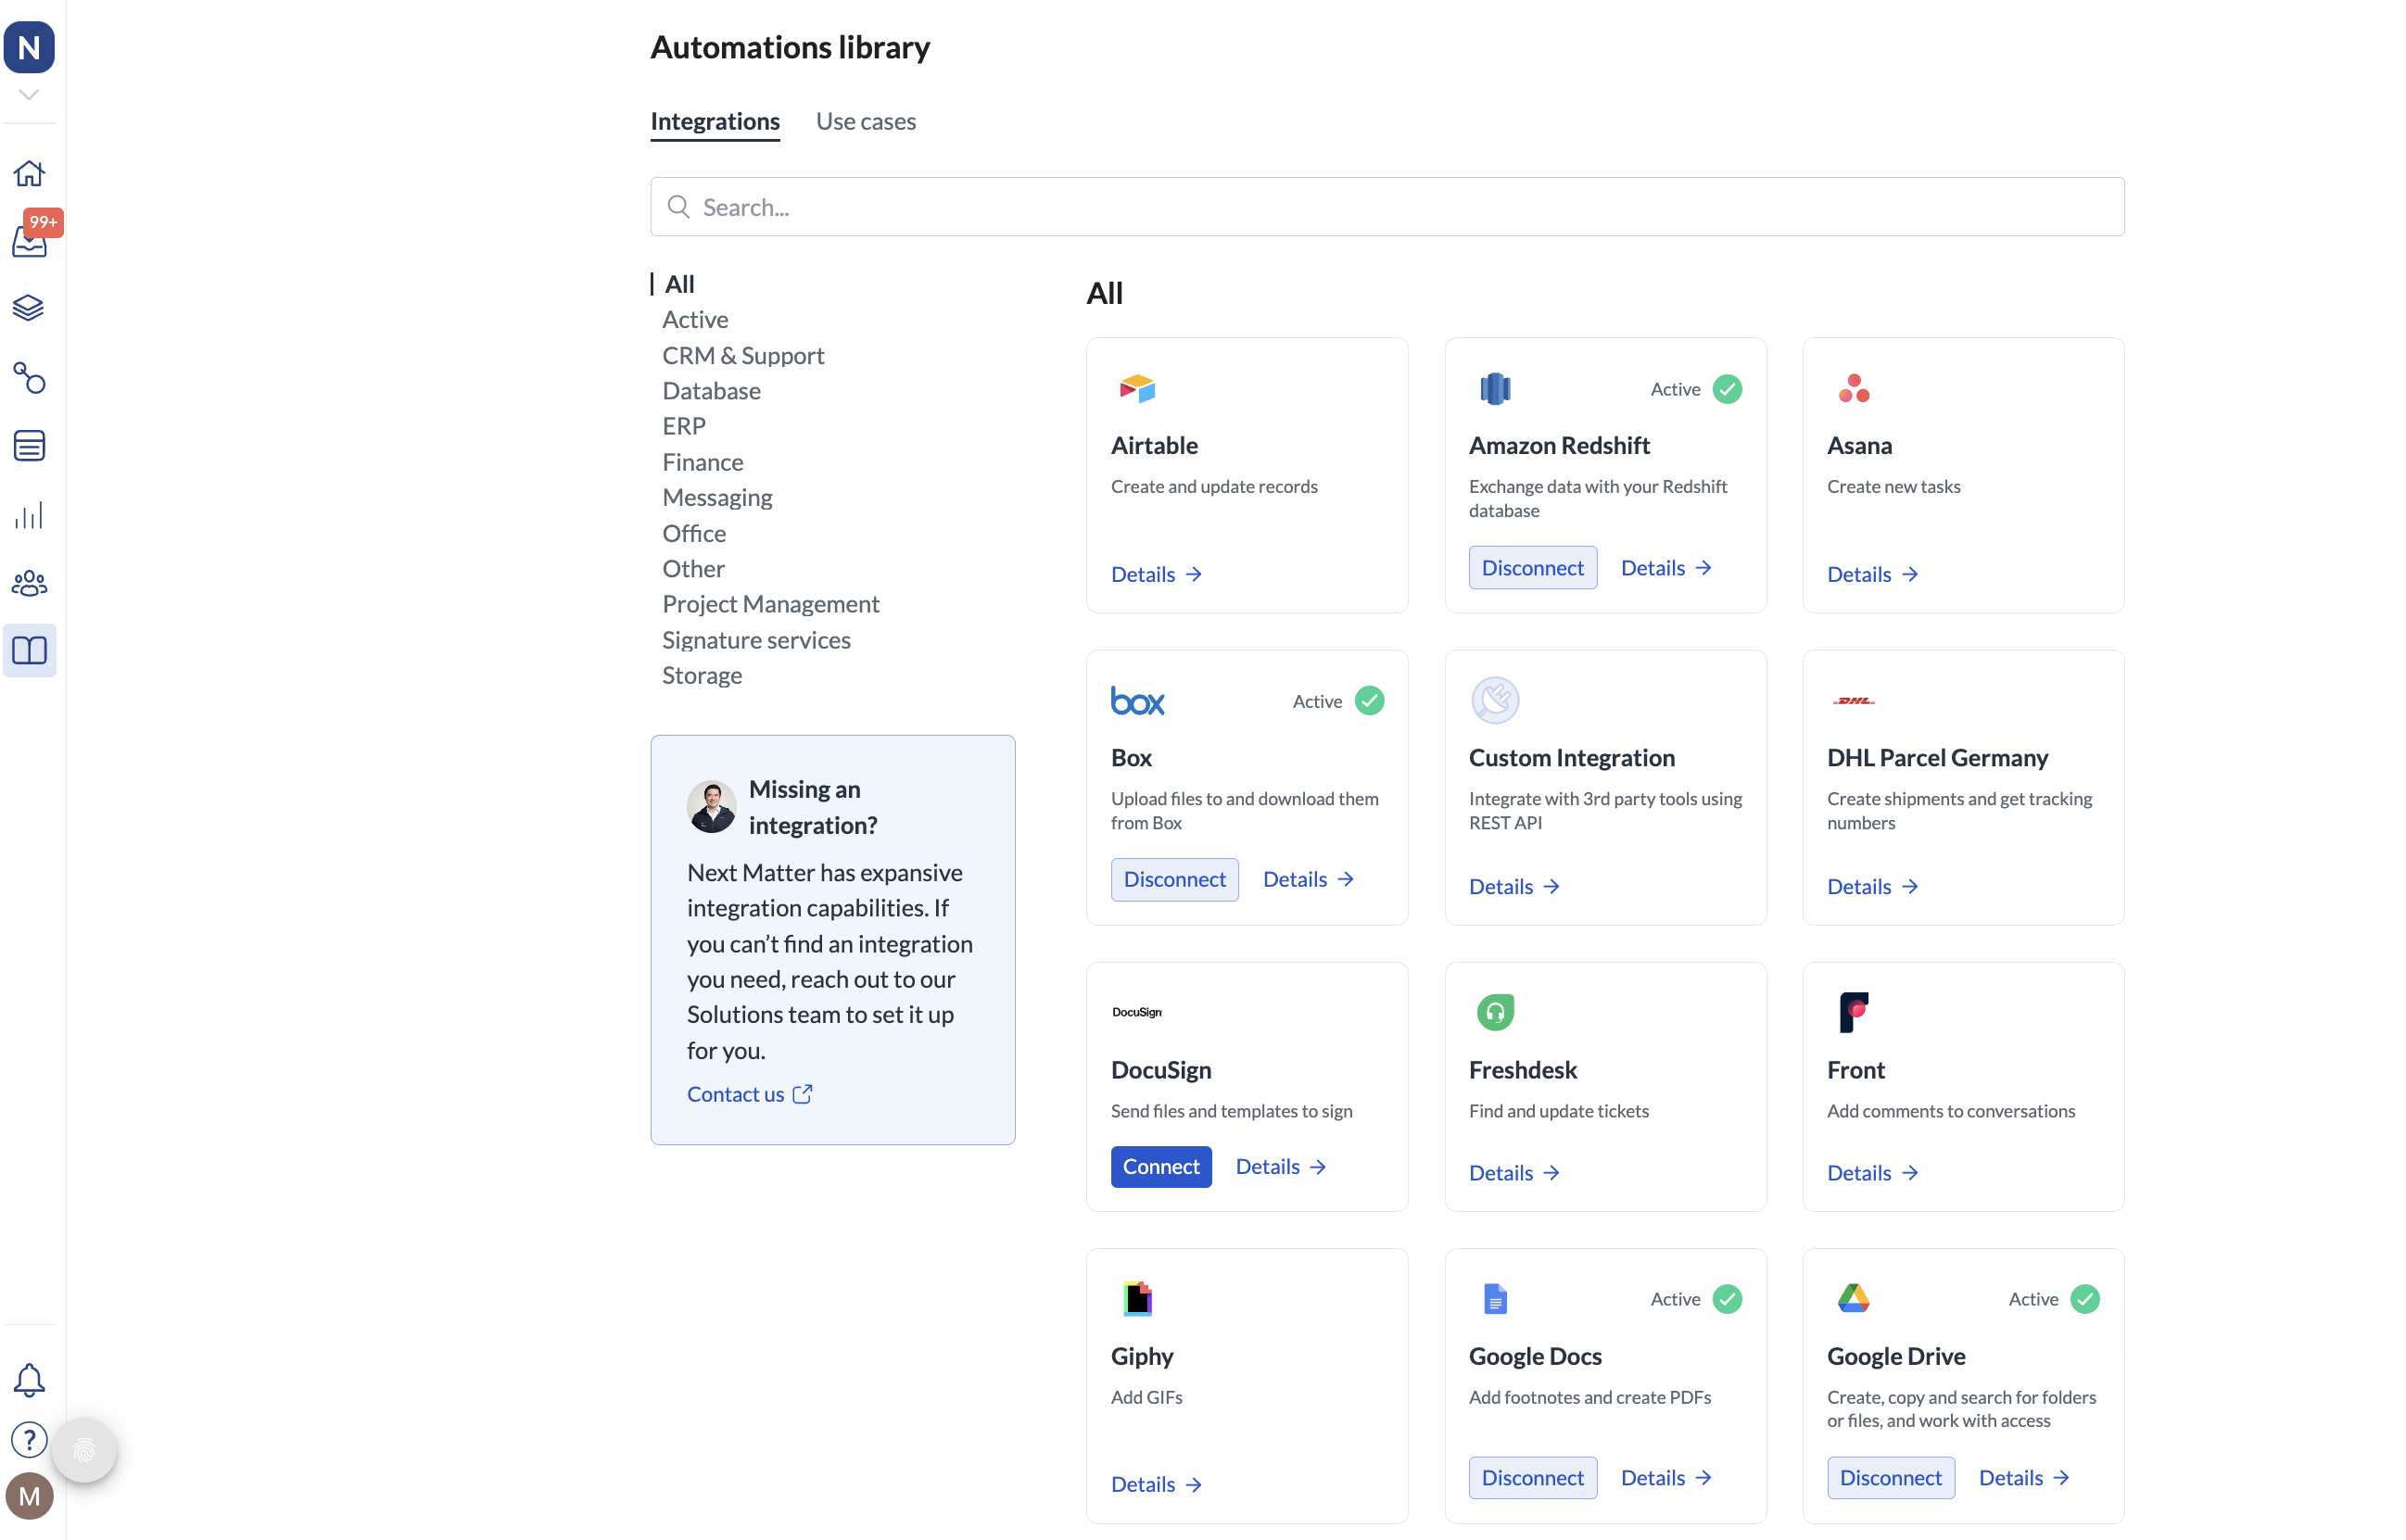
- In the main navigation, go to Automations library.
- Open the Integrations tab.
- Search for your integration.
- Click Connect in the integrations tile.
- Provide the required data or consent to the app sharing data with Next Matter.
Users and authentication
The authorization rights for the entire Next Matter workspace are tied to the user who is used to make the integration connection. For example, if you authorize Google Sheets, then Next Matter will ask you to select a user for the Google Sheets connection. As a consequence, Next Matter can interact only with the sheets to which this user has access.How to disconnect an integration
How to disconnect an integration
Any admin can disconnect the integration. Workflows that use integration steps with that integration will no longer work until reconnected by an admin.
- In the main navigation, go to Automations library.
- Open the Integrations tab.
- Search for your integration.
- Click Disconnect for an integration.
Custom integrations
What are custom integrations for?
What are custom integrations for?
Custom integrations are used to connect several 3rd party tools that use REST API, or to call Next Matter API. Normally, these integrations are added and configured as you build a workflow as a custom integration step. With Custom integrations, you can connect most external tools and are not limited to the ones that you can connect within Next Matter.
How to connect custom integrations?
How to connect custom integrations?
You can connect some custom integrations, such as PostgreSQL or Microsoft OneDrive, directly in Next Matter. If the integration you need is not on the list, you can connect it when you build your workflow.
To use custom integrations that you can’t connect directly in Next Matter, you’ll need the 3rd party app’s API key. If you’re not an admin, you can ask your IT department to generate those for you.
- In the main navigation, go to Automations library.
-
Open the Integrations tab.

- Search for your integration.
- Click Connect in the integrations tile.
- Provide the required data or consent to the app sharing data with Next Matter.
Users and authentication
The authorization rights for the entire Next Matter workspace are tied to the user who is used to make the integration connection. For example, if you authorize Google Sheets, then Next Matter will ask you to select a user for the Google Sheets connection. As a consequence, Next Matter can interact only with the sheets to which this user has access.How to disconnect custom integrations?
How to disconnect custom integrations?
Any admin can disconnect the integration. Workflows that use integration steps with that integration will no longer work until reconnected by an admin.
- In the main navigation, go to Automations library.
- Open the Integrations tab.
- Search for your integration.
- Click Disconnect for an integration.
How to build an integration step?
How to build an integration step?
To use such an integration when building a workflow, do the following: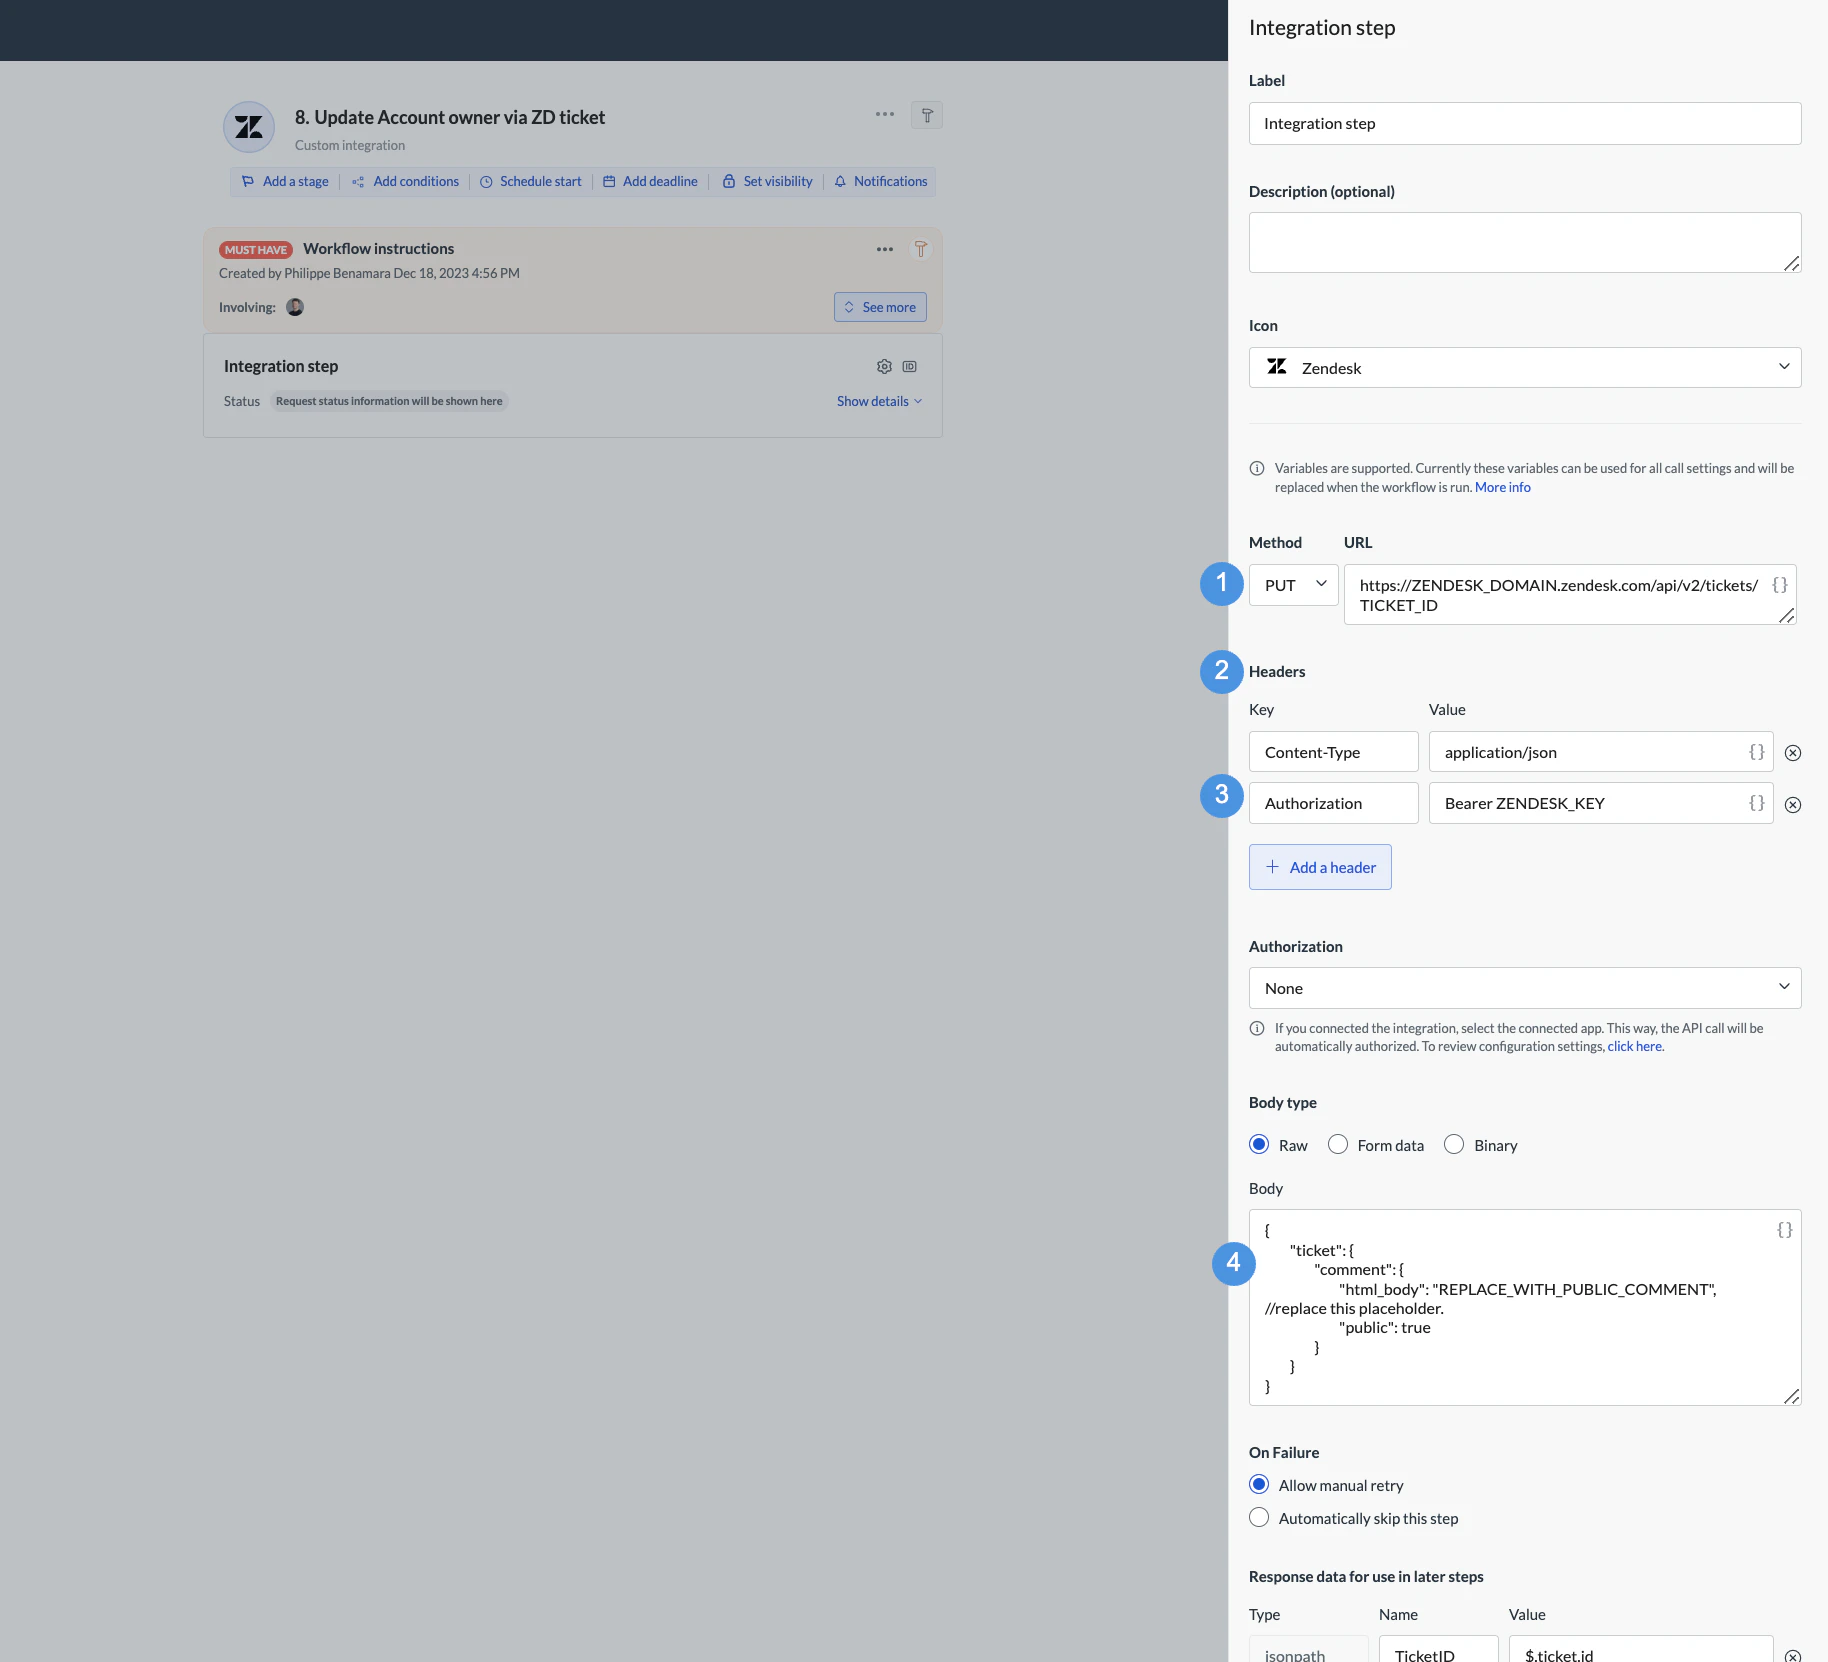
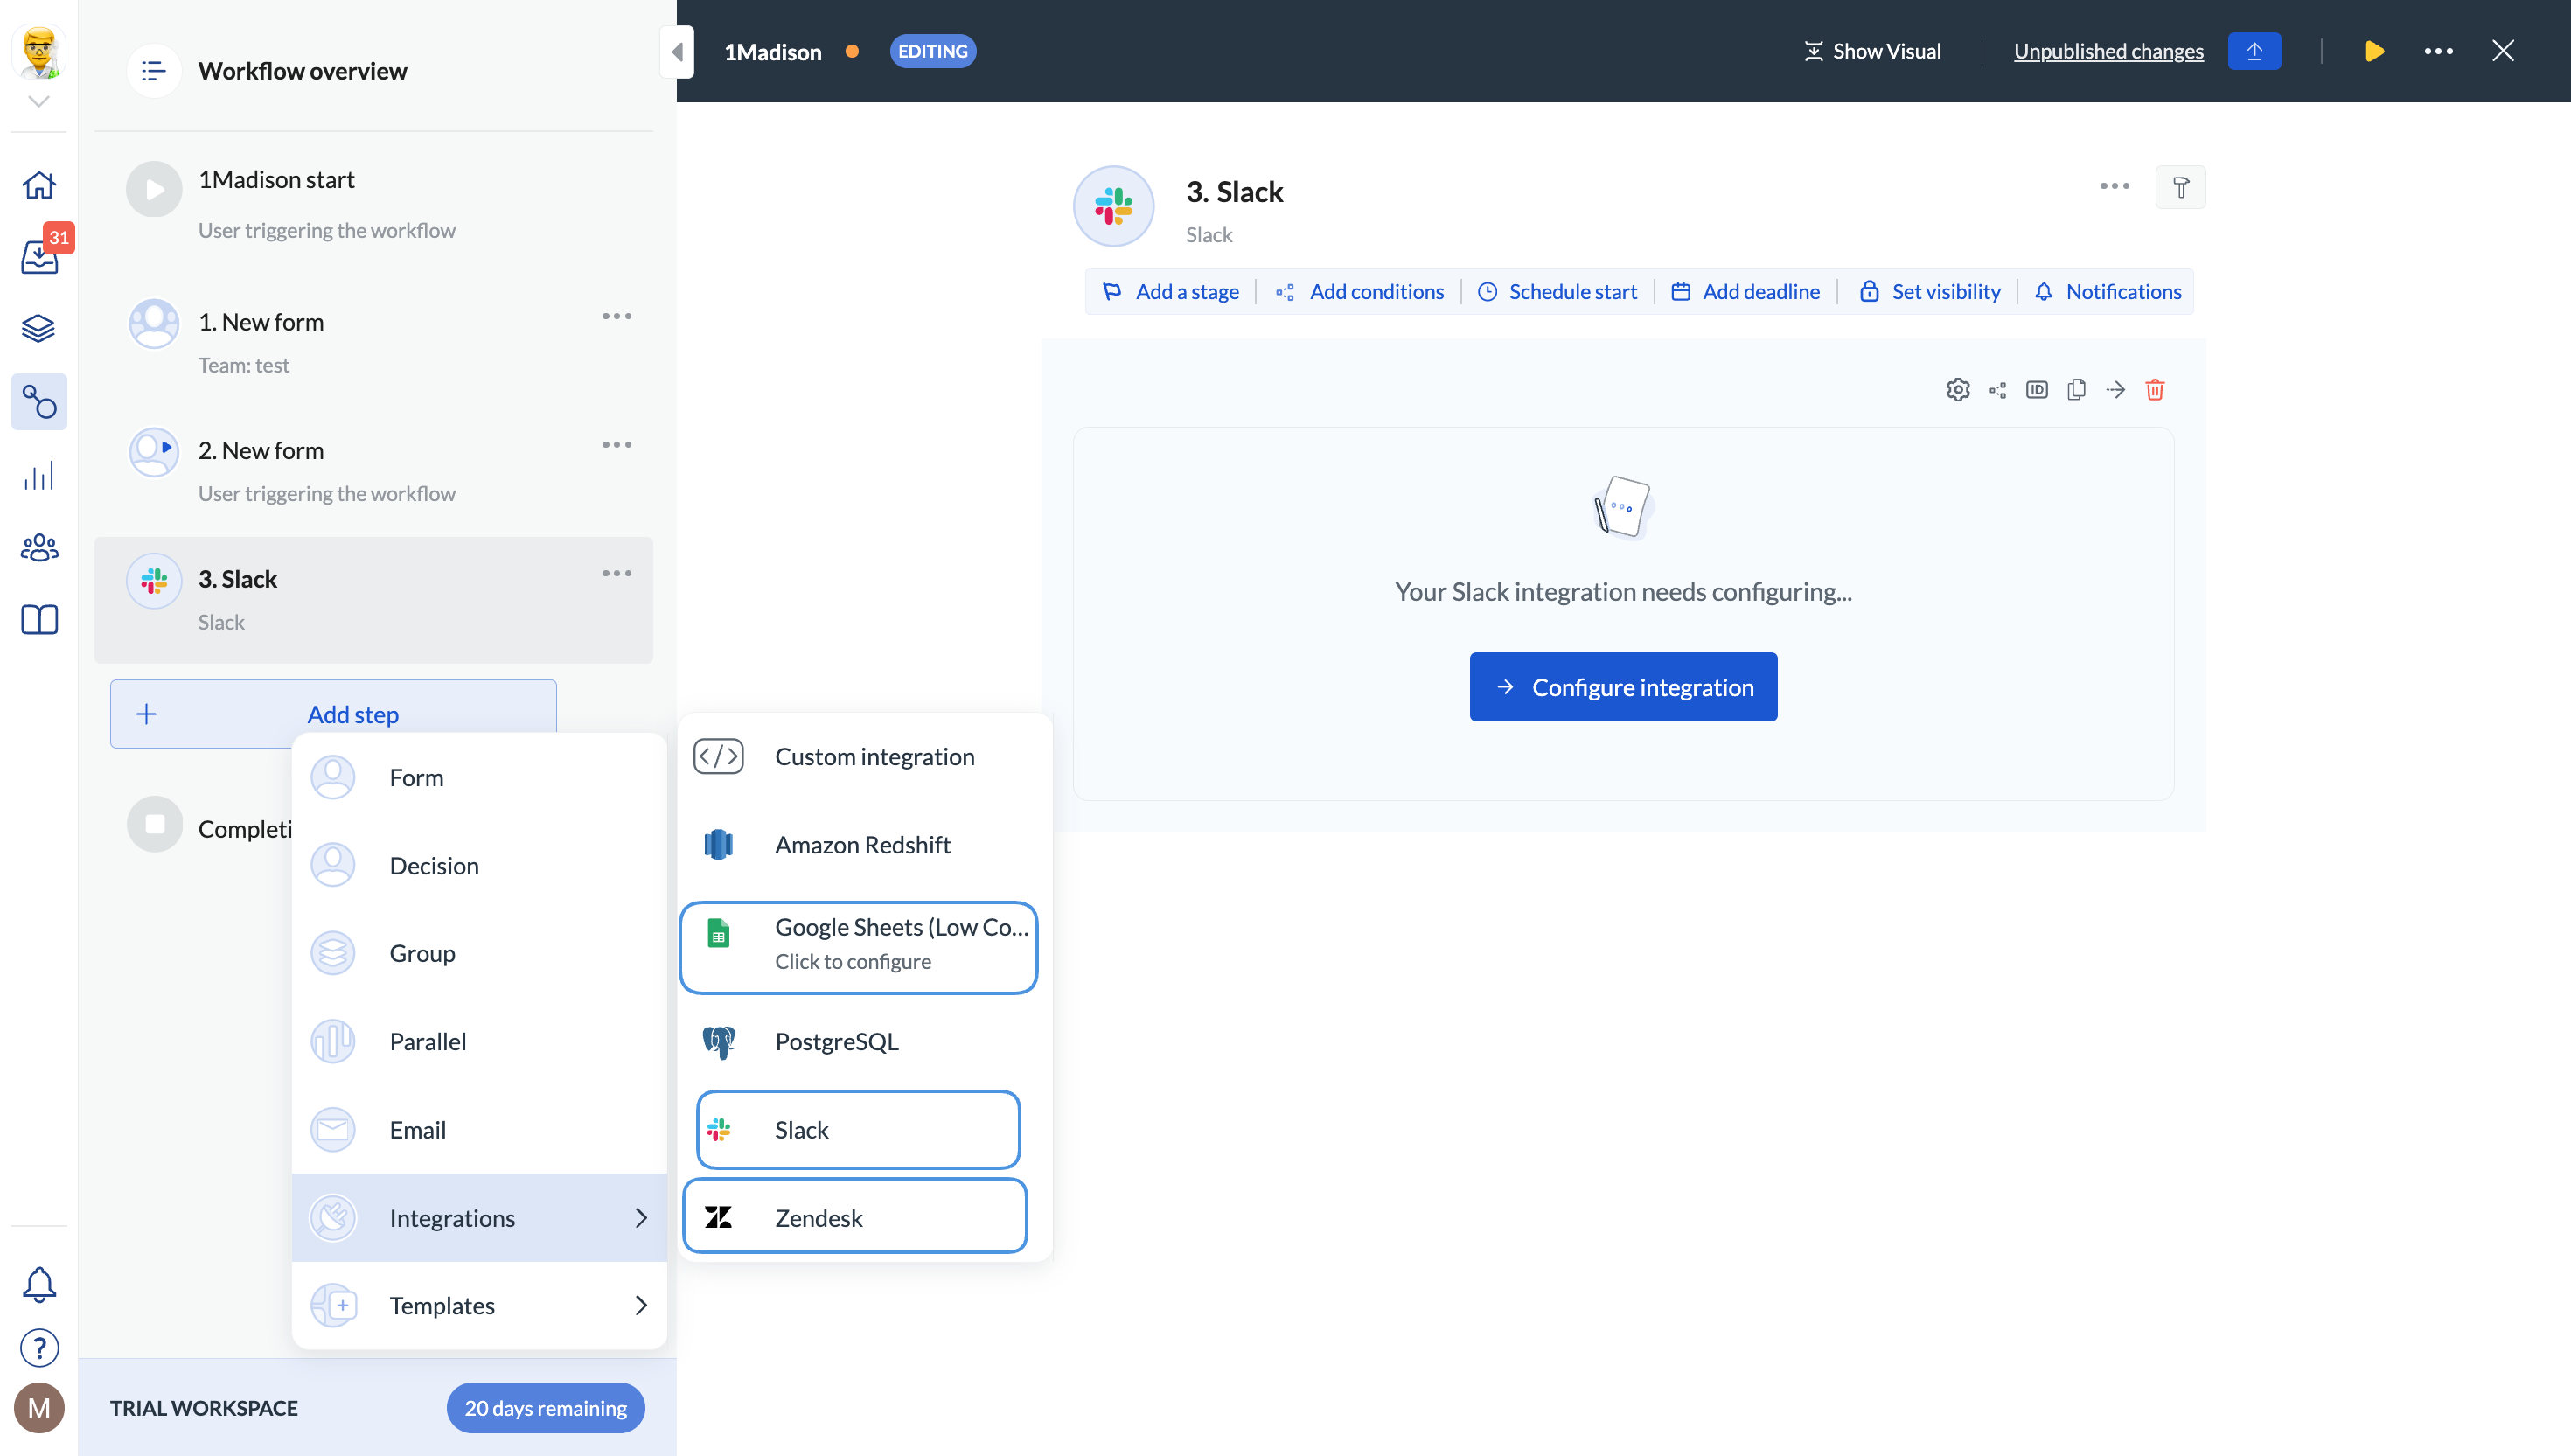
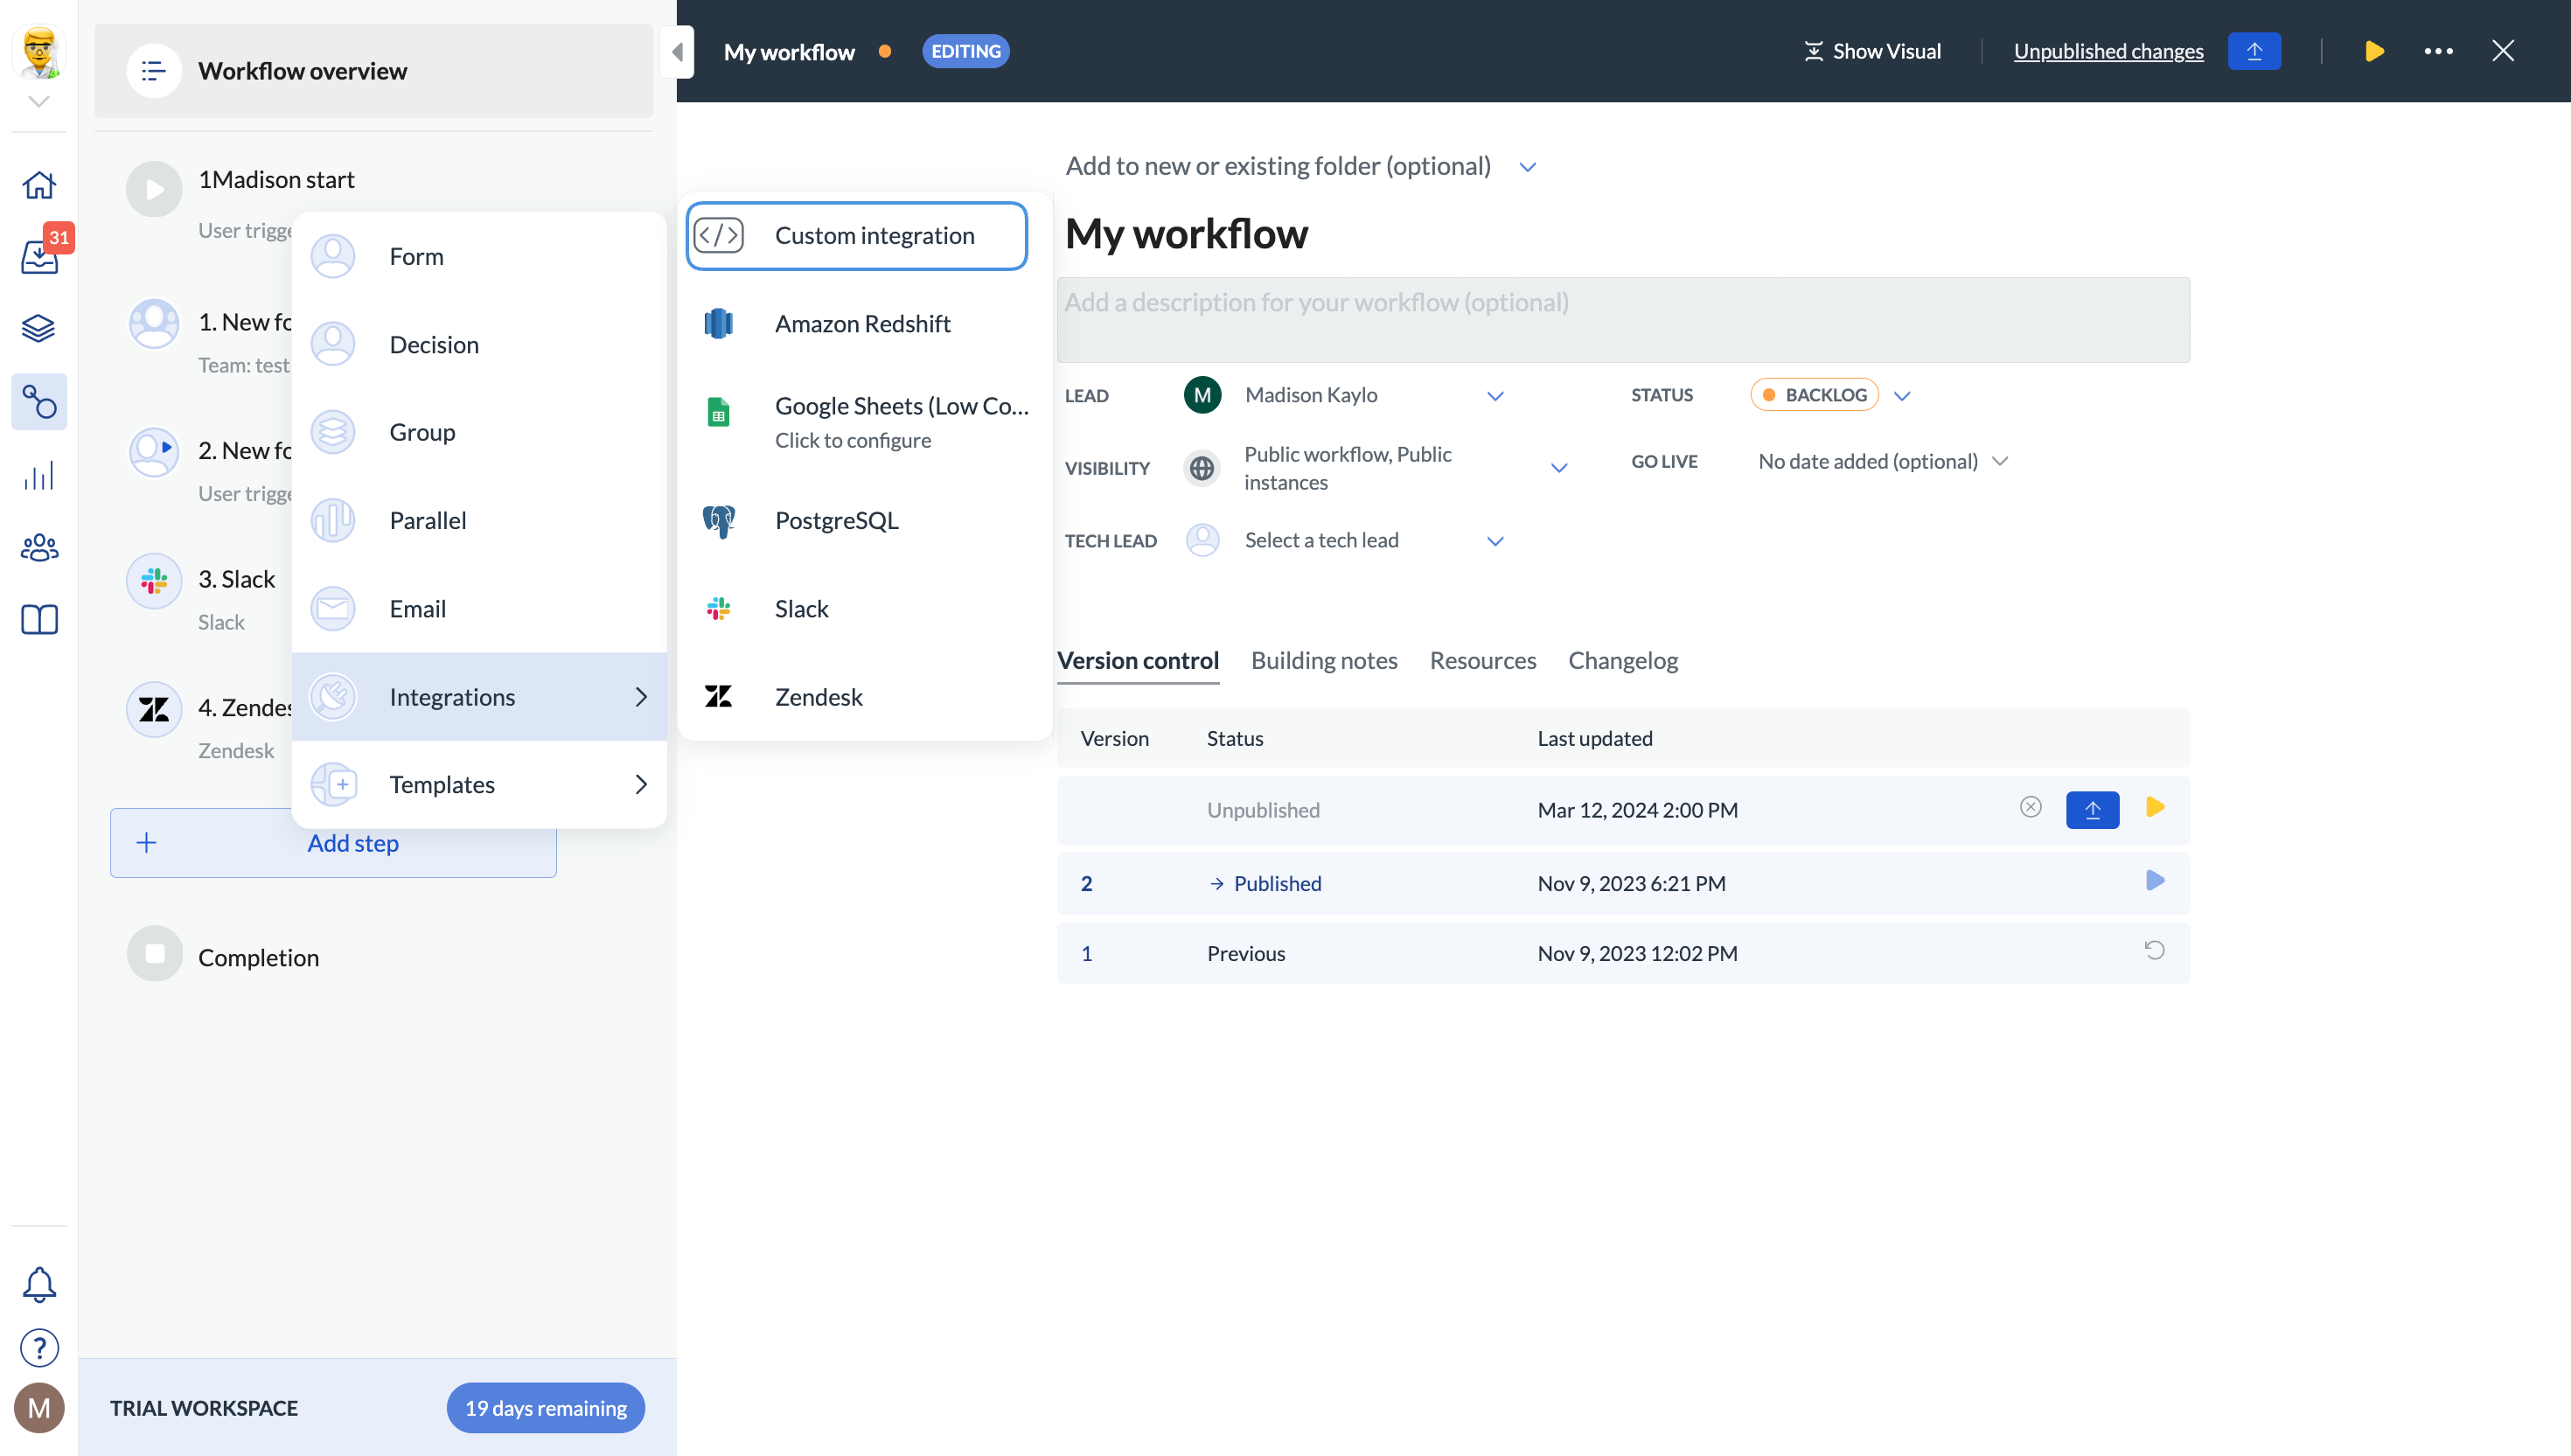
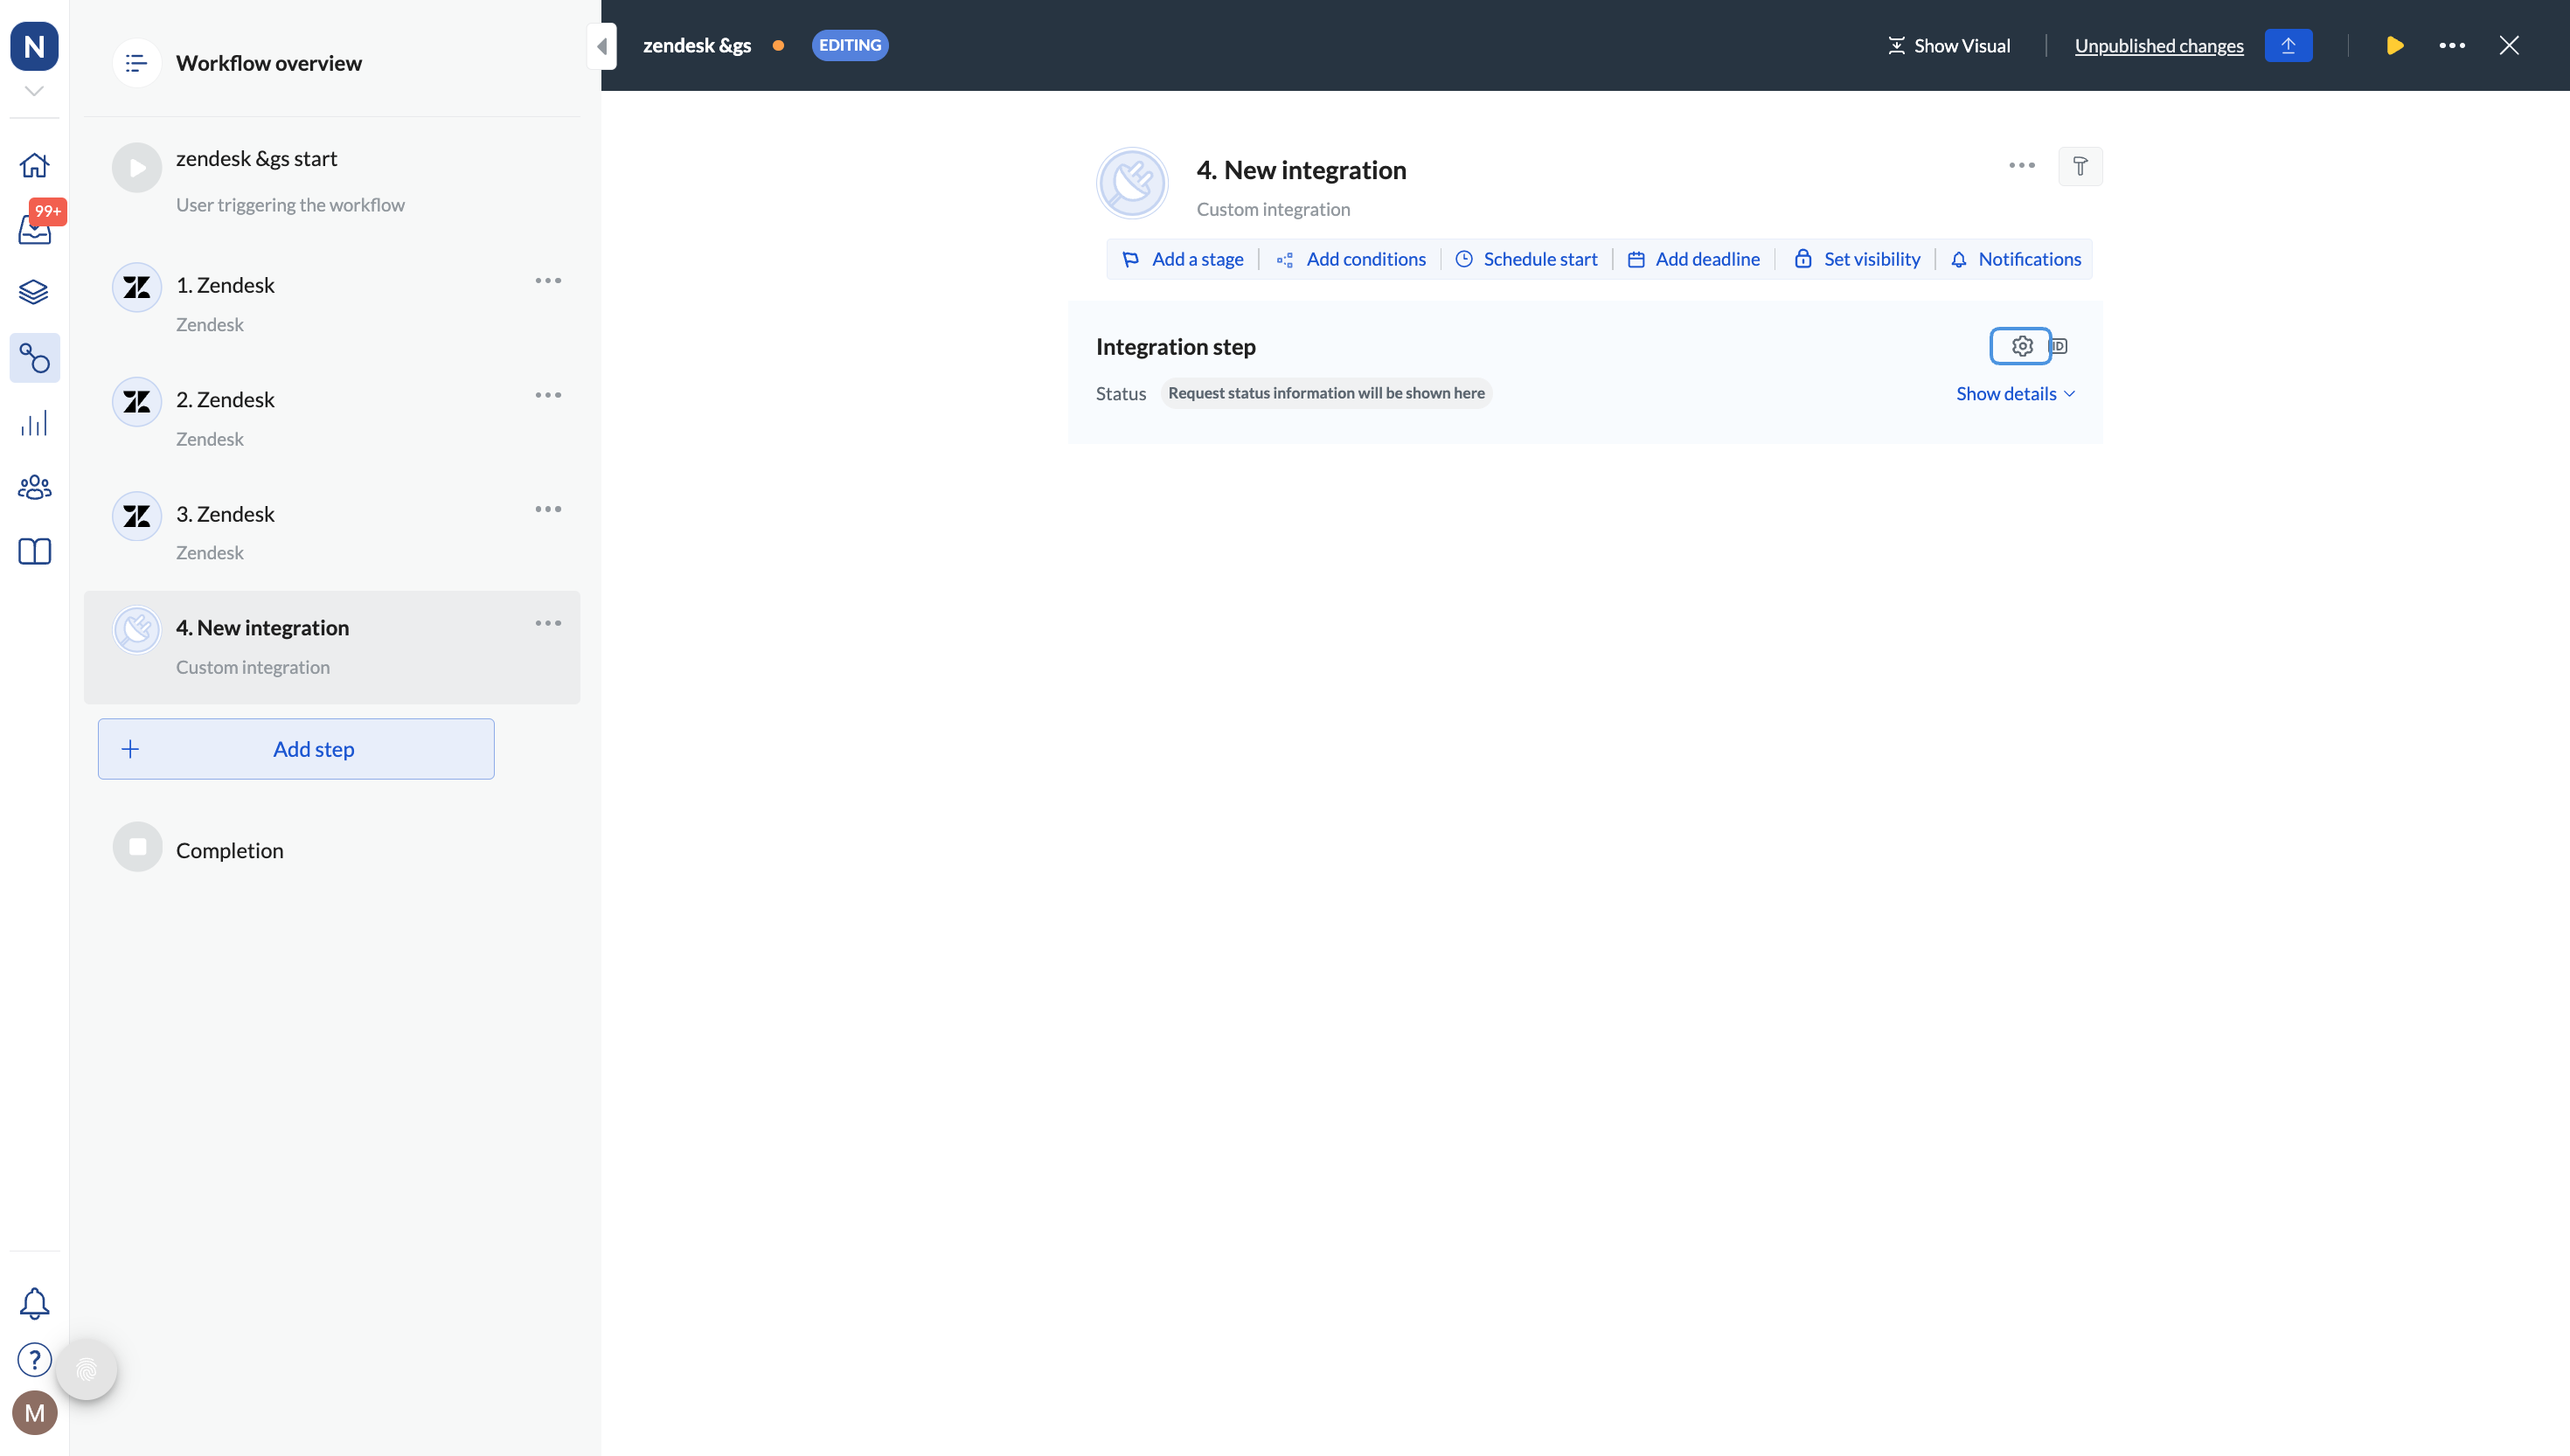
- In your workflow, click + Add step.
- Select Integrations > Custom integration step.
-
Click the step in the left-hand navigation and then click the cog wheel to configure the step.
-
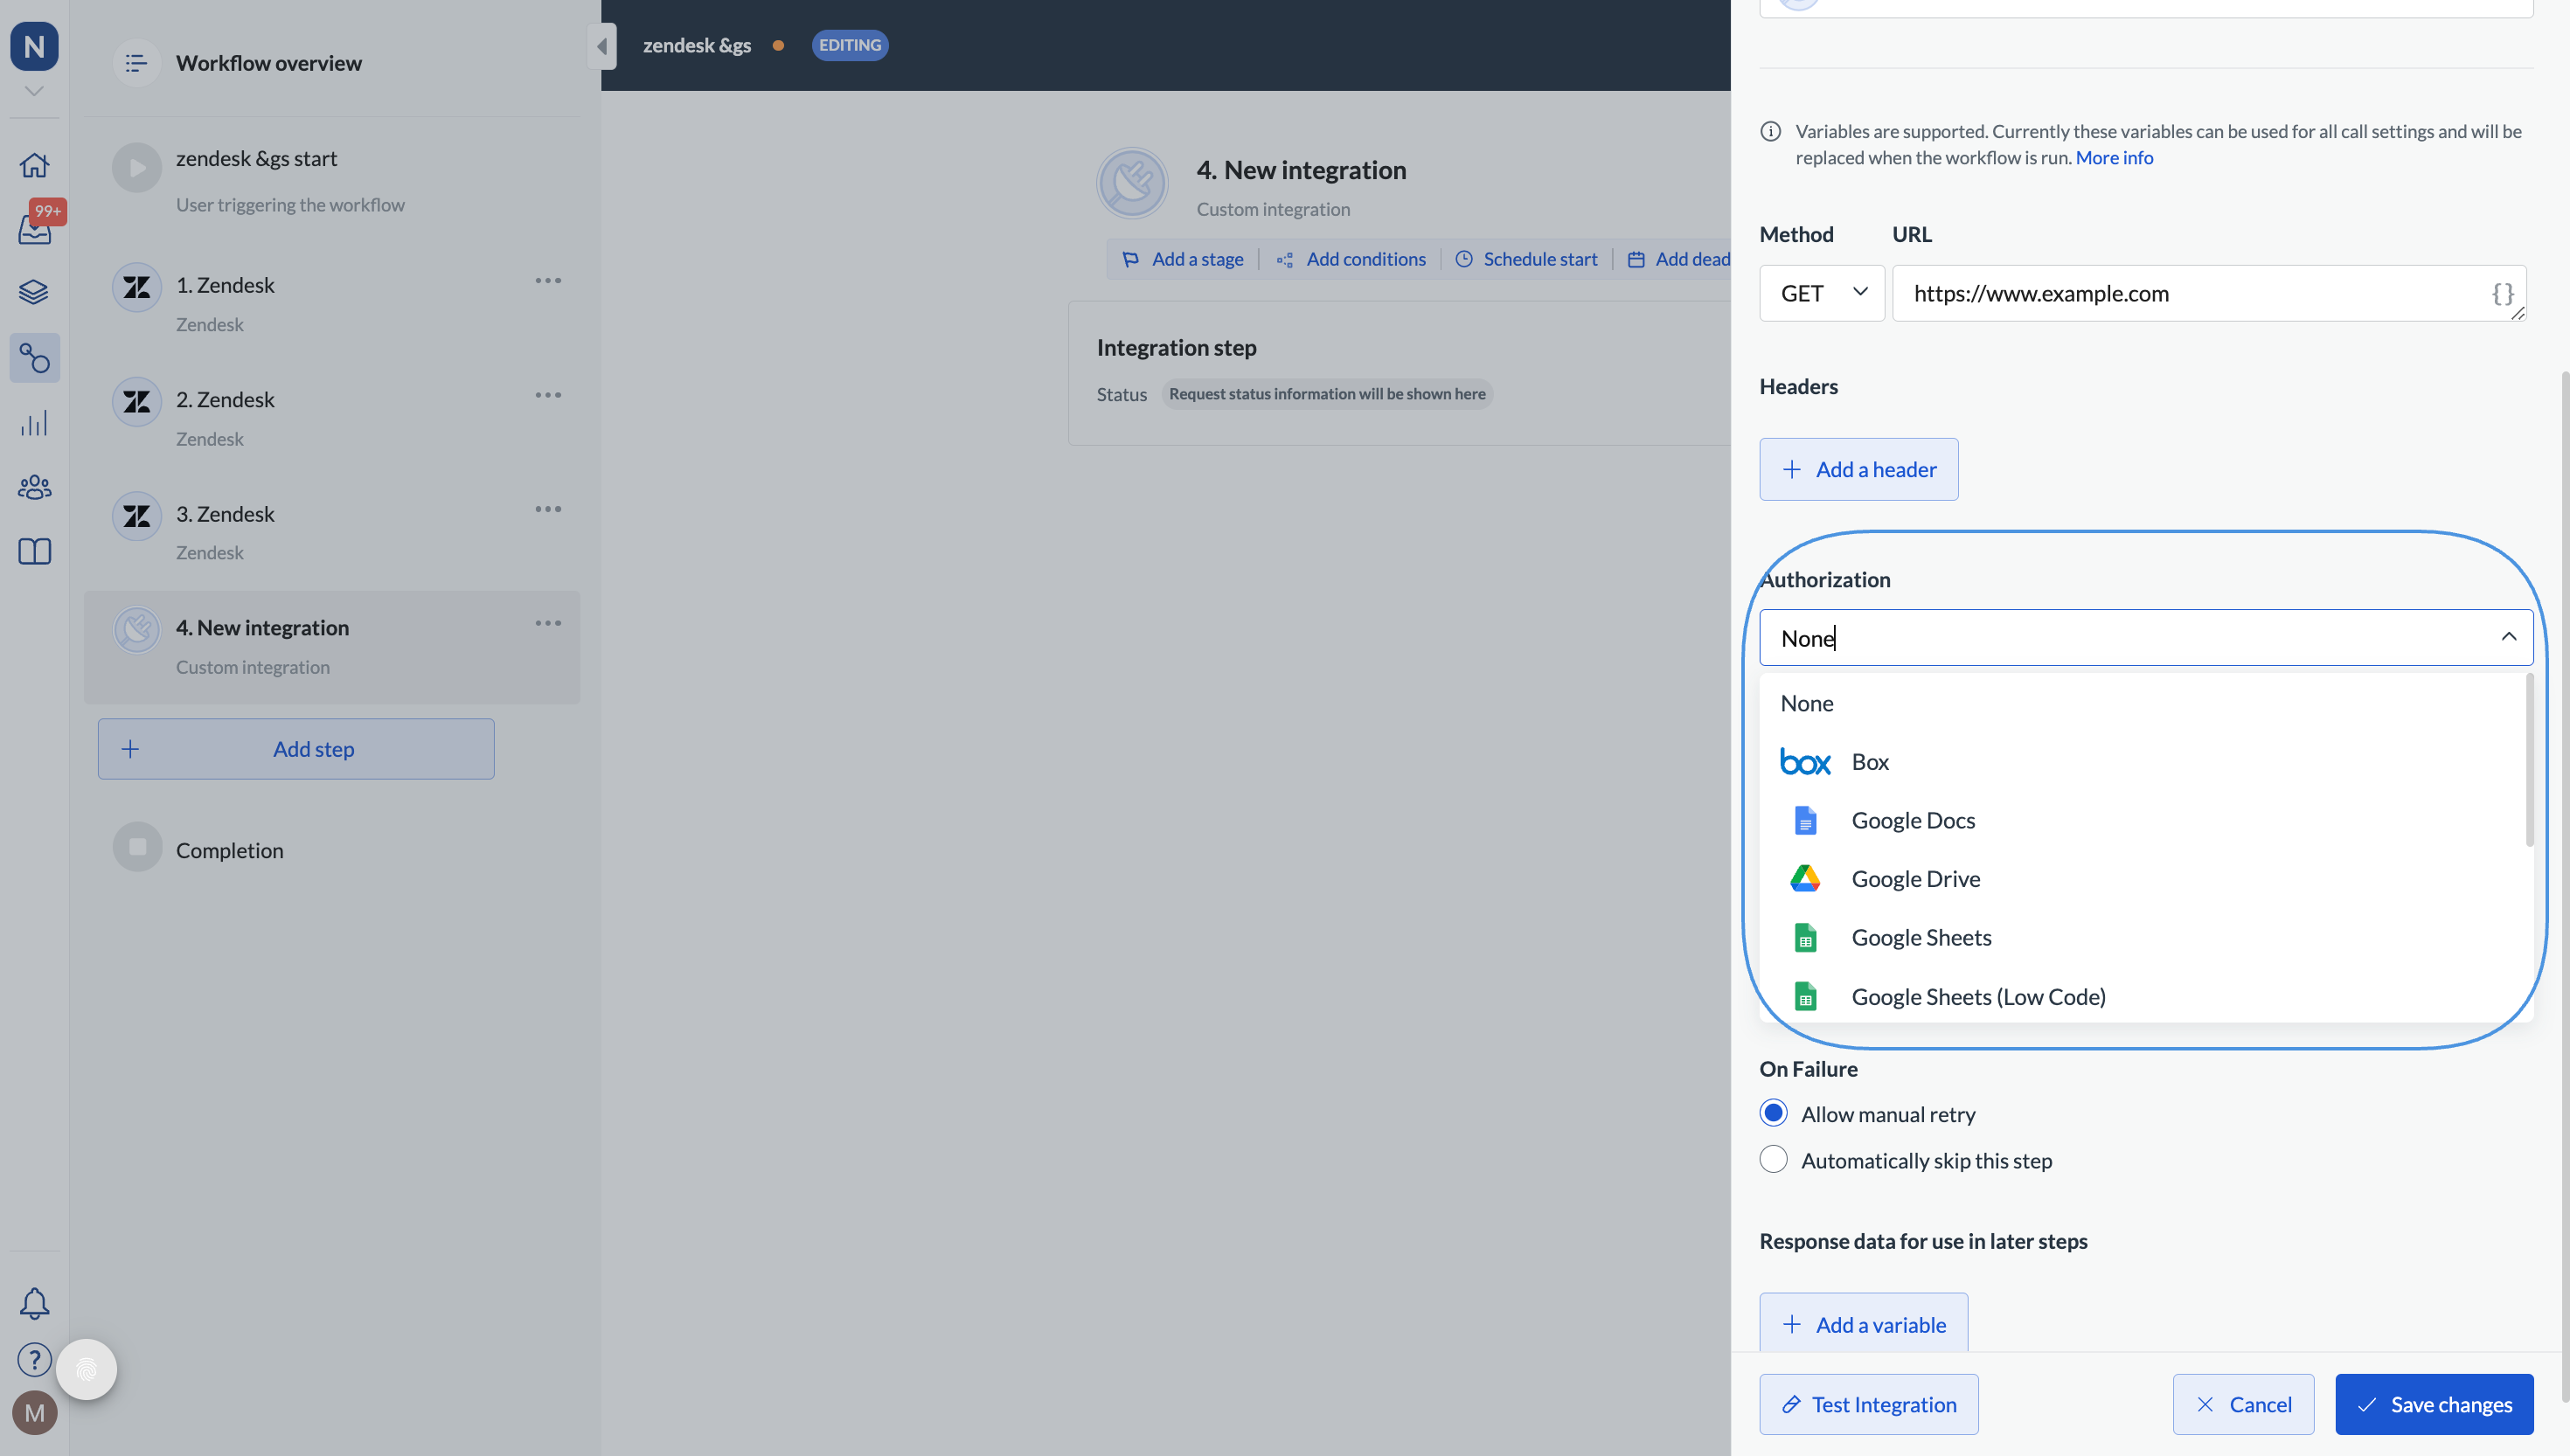
Provide the required details:
- (1) The API method and the URL of the endpoint you’re calling. You might want to check the 3rd party developer documentation for the URL details.
- (2) Headers
-
(3) Authorization header: it can be basic authentication or a token. You need to generate the details in the 3rd party app.
If you’ve connected the app directly in Next Matter, select the connected app from the Authorization dropdown. No additional authorization is required.
- Payload (body of the request in JSON format): you might check the 3rd party developer documentation for any required parameters.
Test integrations
When you create an integration step, it’s a good idea to test the integration first before running the workflow instance.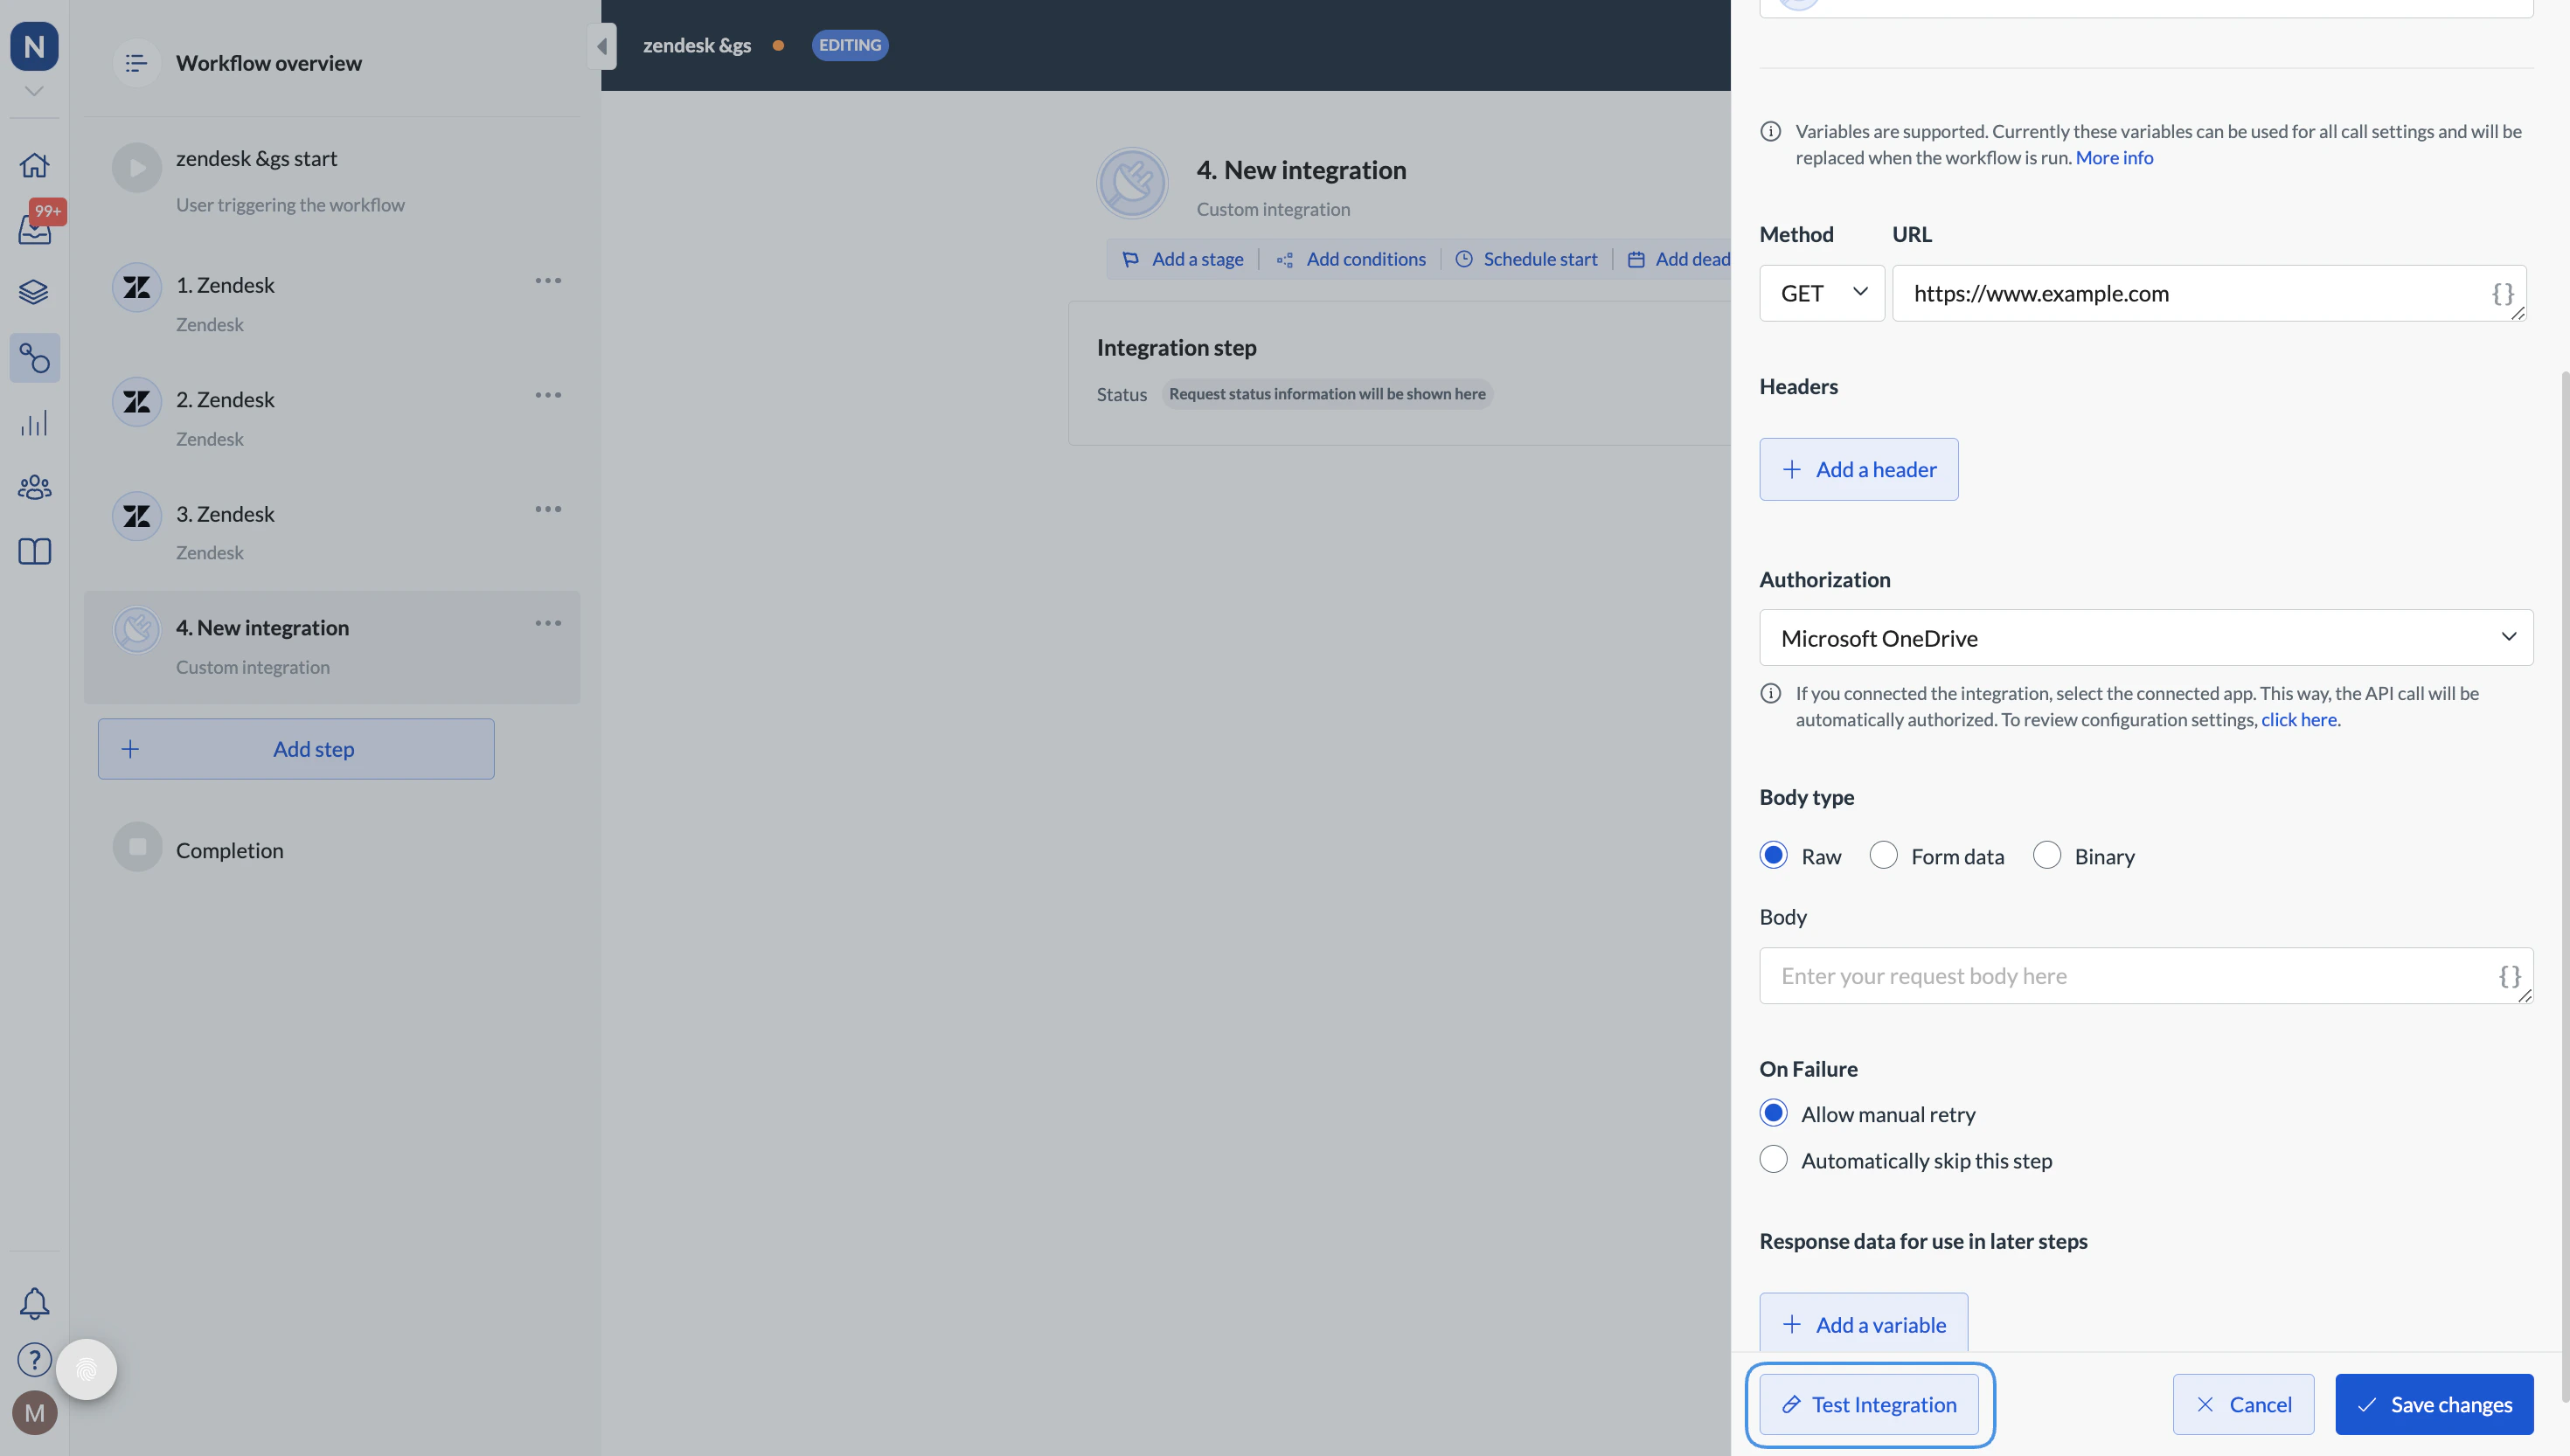
- Click Test Integration.
- Use the generated test values or replace them with your own.
- Click Start Test and see if it gives you a correct response. If not, you can always reconfigure the step and retry it.
- When you get a positive result, click Done and work on the rest of the workflow.
Integration responses
Use the integration step response to troubleshoot failed steps or to extract specific variables (using JSONPath). To see the response body, click Show details.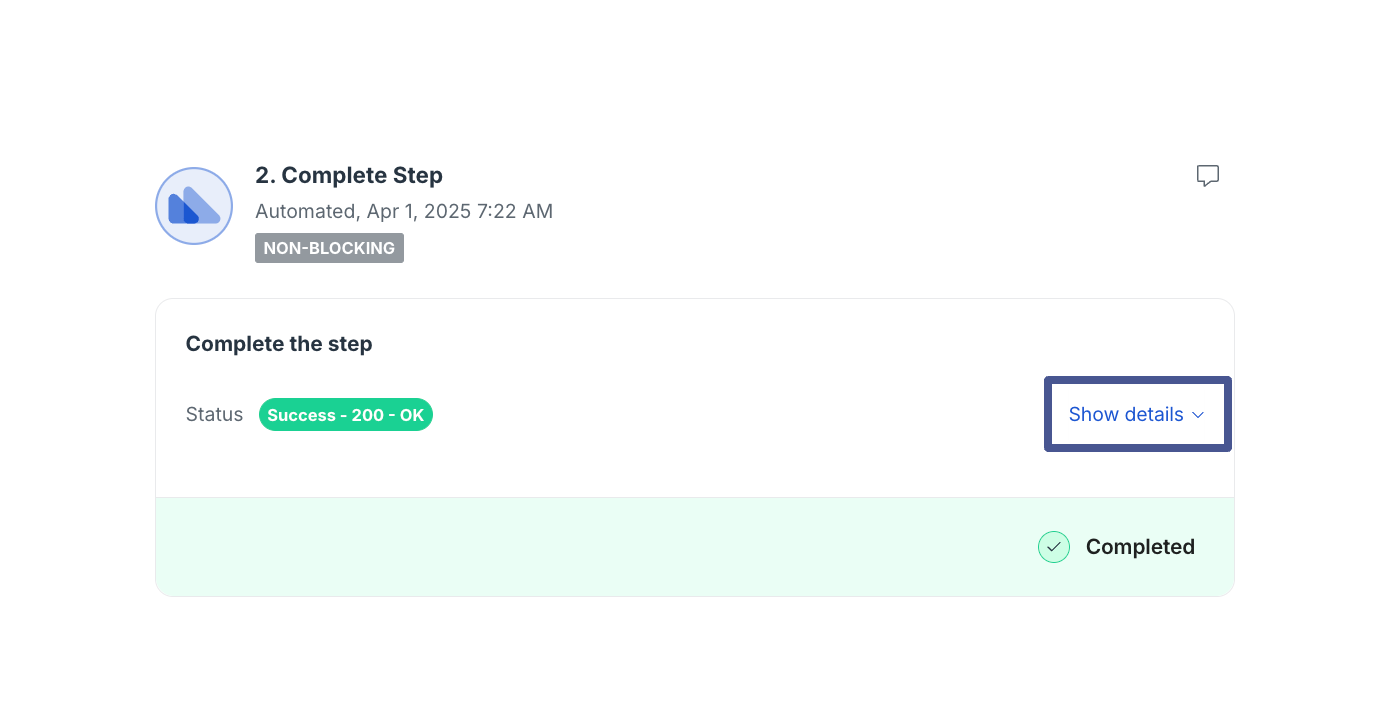
Skip failed integration steps
When you configure an integration step, you can decide what to do if the connection fails. You can either:- decide to skip the step and let the workflow continue
- pause the workflow at the step allowing the admin an option to skip or retry the step. A failed step will automatically send the admin and the tech lead notification to their Next Matter inbox.
View the original call body of a skipped integration step
When an integration step is skipped due to an error or by mistake, the step may appear greyed out, making it hard to investigate further. A potential improvement would be the ability to directly view the original call body for skipped steps. However, here’s a quick workaround: Inspect the skipped step:- Right-click on the greyed-out step in your browser.
- Select Inspect to open the developer tools.
-
Remove the following class:
<div class="content-overlay--i6VCT empty-overlay--Kh9Fy"></div>